A pdf of the Monotype: Overview and the Monotype: Getting Started text can be downloaded here.
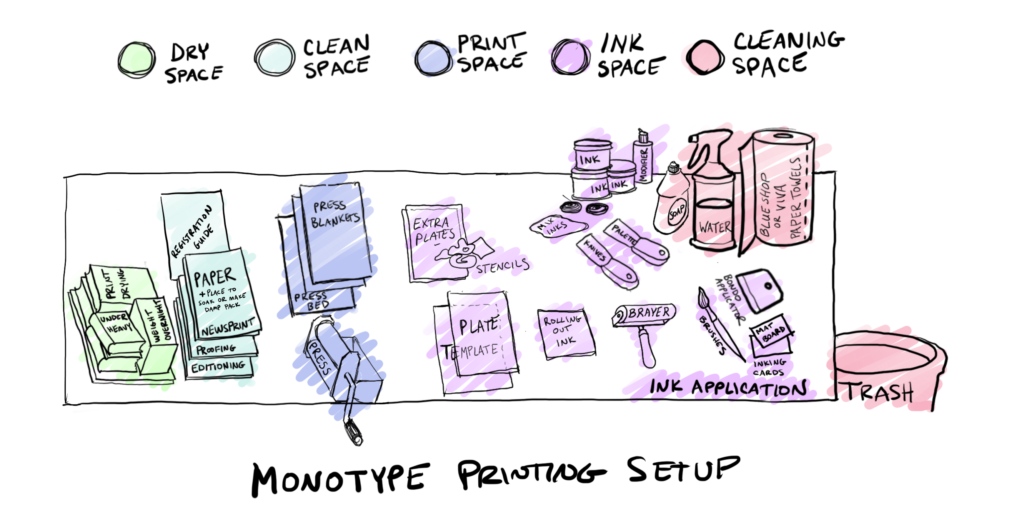
Table of Contents
SUPPLIES
- Printing paper
- Printing plate/s
- Stencil material/s
- Ink
- Newsprint
- X-acto knife and cutting mat or scissors
- Ruler
- HB graphite pencil
- Smooth, non-absorbent surface to mix and roll ink
- Brayer/s (speedball soft rubber brayers are an economical brayer)
- Palette knife
- Mark-making tools, such as brushes
- Printing press
- Tray to soak paper or plastic bag to create a damp pack
- Space to dry and flatten prints under suspension
- Apron
- Gloves (nitrile recommended)
- Cleaning supplies: mineral oil, dawn dish soap, water, towels
PAPER
For printmaking with limited space, the following papers work well as they are available precut in small sizes and are a thinner weight, allowing for a successful transfer using the lighter pressure of hand printing processes.
Machine-Made (Western) Paper
- Speedball Printmaking Pad (less expensive paper)
- Speedball Arnheim 1618 (more expensive paper)
- Strathmore 300 Series Printmaking Paper (thinner than the 400 series, better for hand printing)
Washi

PLATES
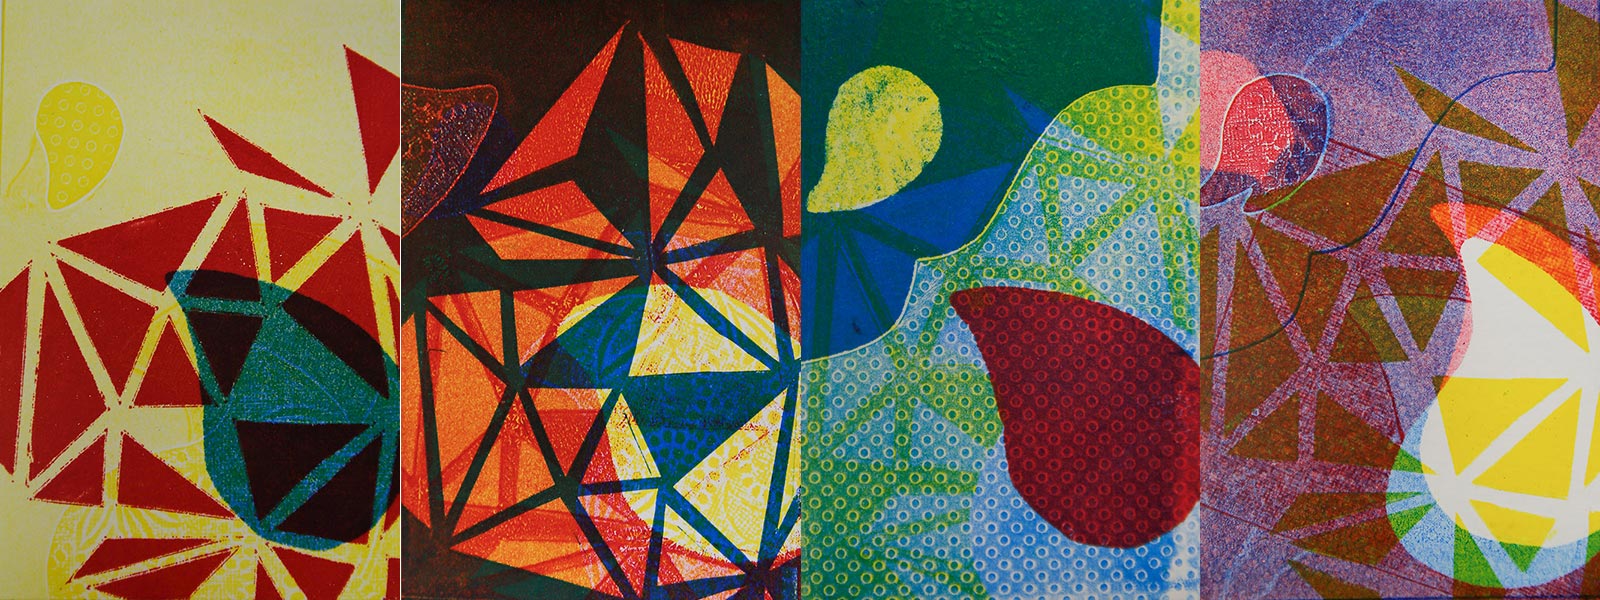
Any non-absorbent plate will work for monotype. If the plate is thicker than 1/16 inch, the plate edge should be beveled with a file so the paper does not tear during printing. If the plate has texture, the texture will reproduce creating a monoprint rather than a monotype. Plates can either be 90 degrees at the corners or cut to shapes. If printing with plates smaller than the paper dimensions, consider the placement of the plate on the paper and print using a registration guide. Bleed prints, or prints larger than the paper, can be created by printing with a plate larger than the paper dimension.
- PETG (Akua printmaking plates are available in small, pre-cut sheets, or buy large 4’x8’ sheets in bulk from a commercial plastics vendor)
- Plexiglass (if thicker than 1/16 inch bevel using a file)
- Yupo paper
- Found plates, such as smooth food packaging plastic (raised edges removed) or Tetra Pak packages
- Paper, mat board or fabric sealed with acrylic gloss medium or gesso (any textured brush strokes will print, resulting in a monoprint)
- Gelatin plate (Gelatin Monotype Printmaking book, online tutorial)
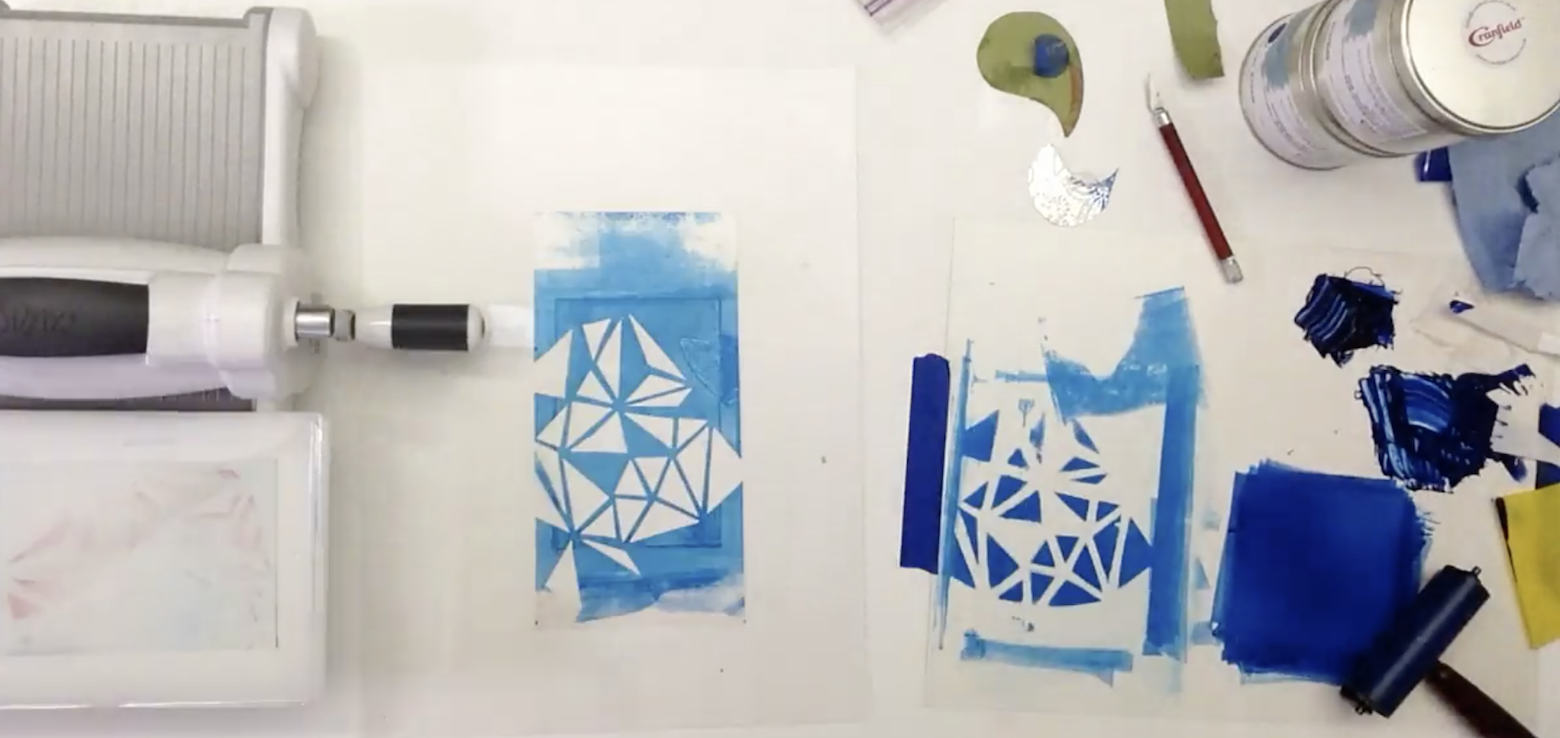
STENCIL MATERIALS
Non-absorbent stencil materials allow for cleaning off residual ink between prints, so the stencils print pure color with each impression, uncontaminated by prior ink colors. Semi-absorbent and absorbent stencil materials cannot be fully cleaned between prints, and residual ink may transfer. To use semi-absorbent and absorbent stencil shapes and retain uncontaminated color transfers, only use one side of the stencil to keep the other side clean, and then allow the ink on both the stencil and the print to fully dry before printing additional layers. For a more painterly and experimental approach, print without offsetting residual stencil ink or allowing the ink to dry, so the residual ink on the stencil transfers to the final print during subsequent use.
NON-ABSORBENT MATERIALS ALLOW FOR A REUSABLE STENCIL
- Art materials
- Plastic stencils cut from thin PETG, wet media or matte duralar, stencil film or yupo paper
- Paper stencils coated front and back with acrylic paint or medium
- Non-art materials
- Smooth, thin plastic packaging from food and product packages
- Thin, smooth cardboard packaging covered on front and back with plastic tape, such as packing tape, prior to cutting stencil
- Fabric coated with acrylic gloss medium or gesso
SEMI-ABSORBENT MATERIALS ALLOW FOR SEMI-REUSABLE STENCILS
- Non-art materials
- Wax paper
- Heavy craft paper
- Coated cardstock or heavy weight paper, such as magazine covers
ABSORBENT MATERIALS ALLOW FOR SINGLE USE STENCILS
- Art materials
- Smooth or textured uncoated papers, such as newsprint and washi
- Non-art materials
- Any smooth or textured uncoated paper or thinner paper
- Uncoated fabric
TEXTURED STENCILS
Stencils should be relatively consistent in thickness with variations of no more than 1/16” in height. If printing by press, avoid sharp edges or metal objects, such as coins or buttons, as these can damage the press bed or roller.
- Textured wall paper
- Crumpled and smoothed aluminum foil
- Lightly textured paper, such as rice paper with inclusions or textured scrapbook paper
- Found or manipulated fabric, without zippers, buttons, or thick seams. Fabric can have hand embroidery or machine stitching.
PRINTING INK
(excerpted from https://www.imcclains.com/catalog/ink/Caligointro.html)
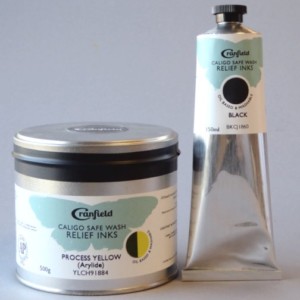
Caligo Safe Wash Relief Ink
Caligo safe wash oil-based relief inks have the luminosity and opacity of oil-based inks with the convenience of soap and water cleanup. These inks will not reactivate with water after they fully dry, are lightfast and highly pigmented. The ink can be printed on dry or damp paper. Since the ink is designed to emulsify in soap and water, it is recommended to print with fairly dry paper and make sure there is no surface water on the paper.
Caligo safe wash ink dries by oxidation and polymerization. The ink dries most efficiently if it is printed on absorbent, acid free paper and allowed to dry in a warm and dry environment. Dry wet prints overnight under suspension, such as pinning prints to a board, or weight, by layering the prints between clean newspaper with a stack of books on top. This will keep the paper from warping as it dries.
VISCOSITY
Describes the thickness or looseness of an ink. To loosen ink, oils compatible with the ink are added. Caligo safe wash inks use Caligo oil thinner so the inks remain water soluble. To stiffen ink, magnesium carbonate powder is added.
TACK
Describes the stickiness of an ink. Tack reducers are modifiers that can be added to reduce the tack, or stickiness, of an ink. Caligo inks use the Caligo wiping compound and tack reducer.
OPACITY
Describes the transparency or opacity of an ink. All ink is a little transparent. To make ink more opaque, add a small amount of white ink. To make ink more transparent, mix with transparent base. Transparent base is unpigmented printing ink.
ADDITIONAL INFORMATION
Gamblin monotype printing overview
ADDITIONAL MONOTYPE PROCESS VIDEOS
Rebecca Vincent’s youtube channel
BOOKS:
Monotype/Monoprint: History and Techniques, 1995, Kurt Wisneski
Monotype: Mediums and Methods for Painterly Printmaking, 2001, Julia Ayers
Monoprinting (Printmaking Handbooks), 2018, Jackie Newell
Singular & Serial: Contemporary Monotype and Monoprint, 2019, Catherine Kernan